GUIDE: Getting Started with FixAppt

Sylvester @ FixAppt.com
Last Update 4 lata temu
Introduction
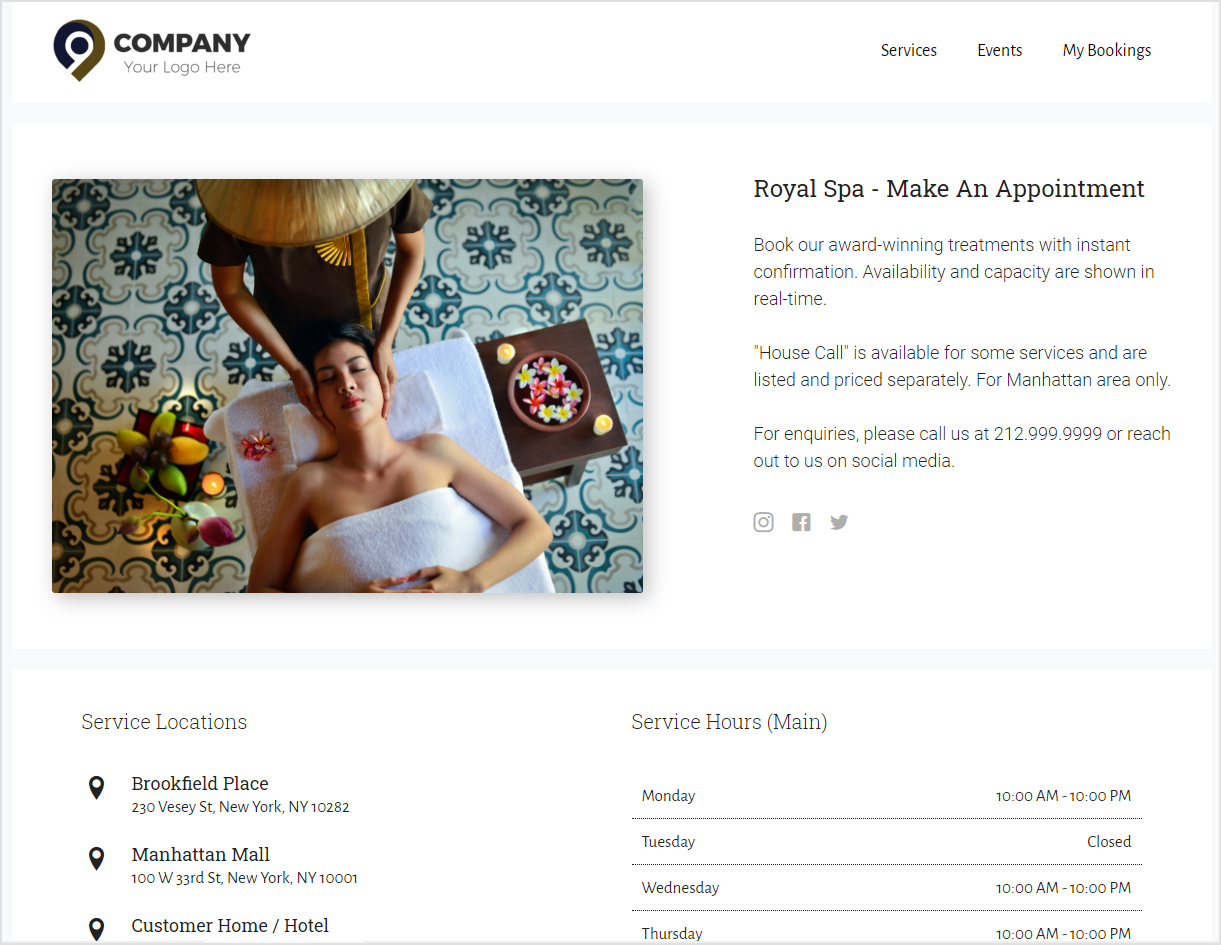
With FixAppt, you can easily present your entire catalog of services and events and take bookings for them 24/7 without going into back-and-forth discussions with customers, thanks to the seamless scheduling automations built into the system.
To use FixAppt, you will need to set up at least one location (can be virtual like "Zoom Meeting", or a non-fixed location like "Customer's Place") and one employee (can be yourself).
You can also optionally take card payments at the point of booking, in the form of a deposit (fixed or percentage) or full payment.
All payments are processed by your own payment service account (Stripe or PayPal). FixAppt does not process or store any of your customers' transactions or card information.
As the Admin, managing your teams' schedules and appointments on FixAppt is a breeze with our intuitive admin dashboard and centralized calendar. Managers⚡can also be added to help manage day-to-day operations by giving them (limited) access to the dashboard.
Employees (if any) will get a productivity boost as they now have a bird's eye view of their latest schedules, and are able to track and manage their own appointments from any device, even when their jobs require them to be out and about. They will also receive automated reminders for their next day's appointment(s).
Employee Portal: yourcompany.fixappt.com/staff
Your Customers will enjoy the convenience of using your services as they are now able to easily book, track, reschedule or even cancel (if allowed in settings) their appointments through a self-service portal without having to call or email and wait for assistance. They will also receive an automated reminder one day before each appointment.
Customer Portal: yourcompany.fixappt.com/customer
⚡ Denotes features available only with the Power Pack addon
Setting up is fast and easy!
When you login to your admin dashboard for the first time, you'll see the below step-by-step setup guide.

Simply follow the easy guide and you should be ready to take online bookings within 15 to 30 minutes, depending on the number of locations, employees and services you may have.
Settings for Stripe, Paypal, Zoom and other optional settings are all found in Settings > Business. Scroll further down this page to see more information on individual settings.
If your business has an existing website, it's a great idea to add a new "Booking" button or a menu link to your new booking website now!
Maintenance Mode
When you first created your FixAppt account, your frontend booking site (https://yourcompany.fixappt.com) is in maintenance mode.
Note that as the admin, you will see the regular booking site regardless of whether "maintenance mode" is on or off.
Your booking site in Maintenance Mode (ON):
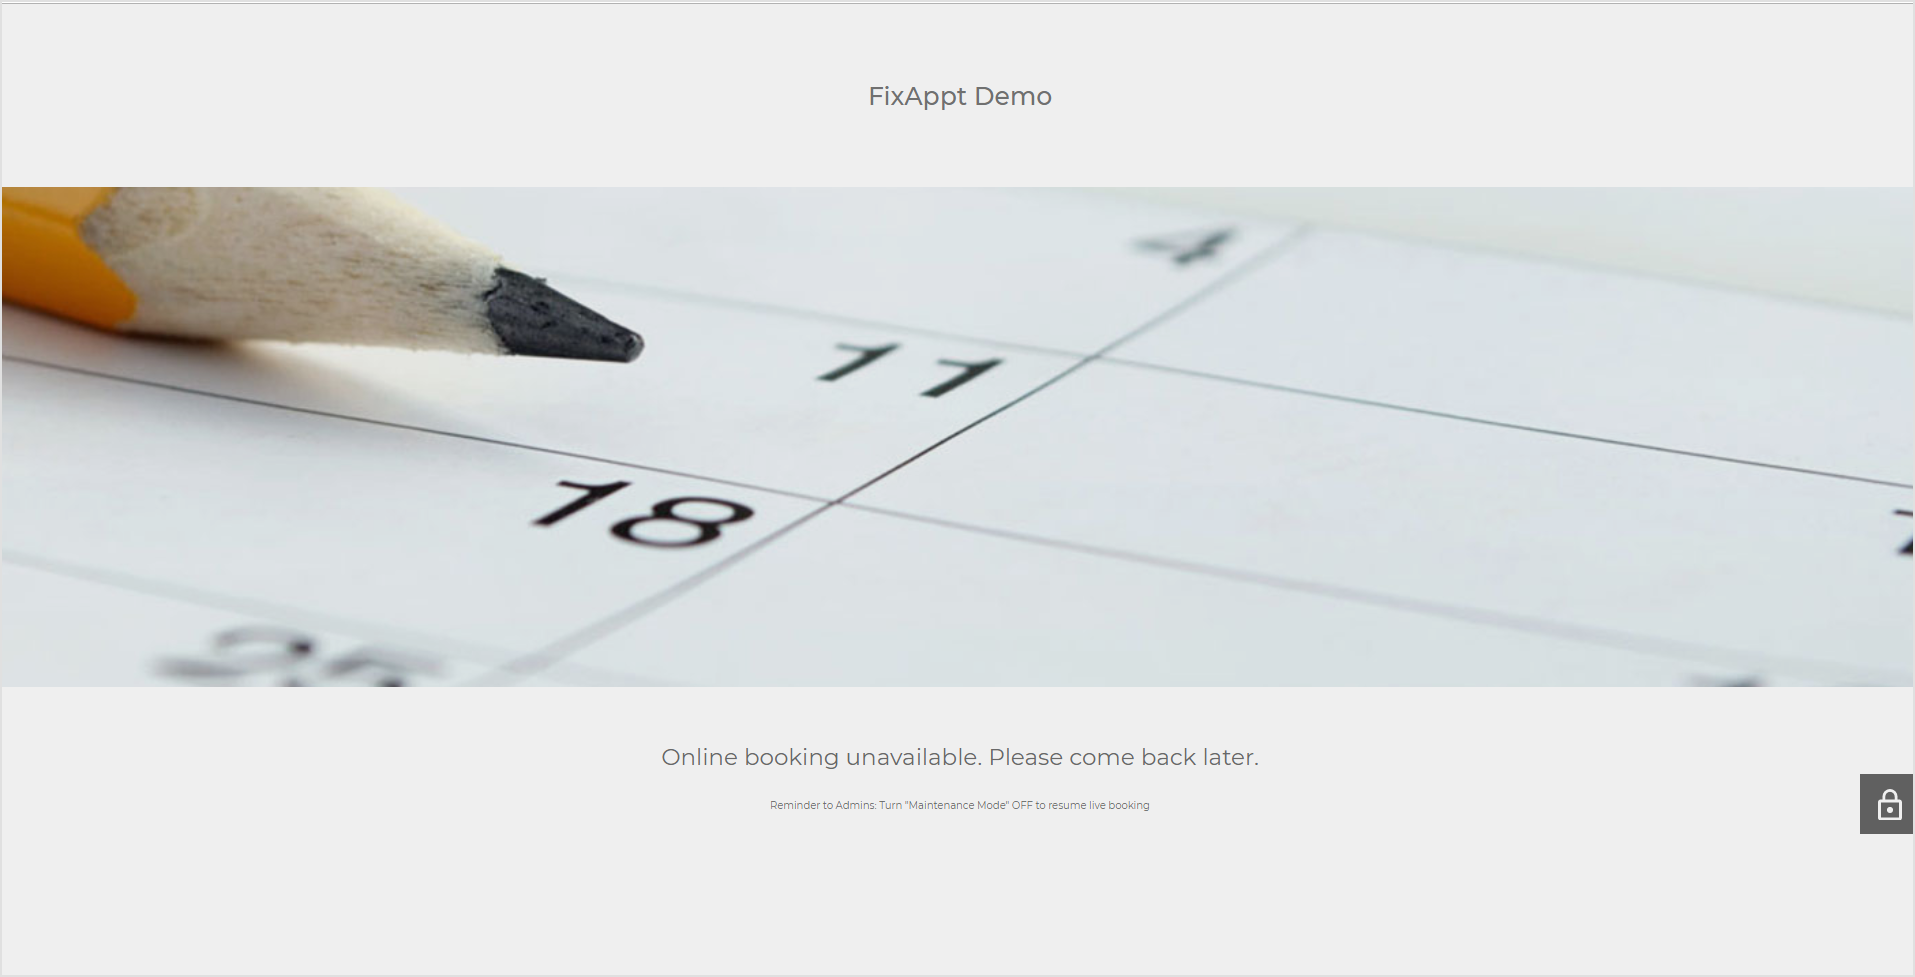
Remember to toggle to OFF when you are ready to go live:

Toggle to ON when you need to temporarily disable public access:

Settings
System Settings
Configure basic site settings such as timezone and date/time format that will be used system-wide.
Booking Form
In the "Colors & Fonts" tab, choose the colors and font of your booking forms (see Booking Site - Branding and Customization for more information). In the "Custom Fields" tab, you can add your own fields to the booking form to collect additional data (by default, only name, email and phone is collected). See Custom Fields to learn more.
Email Templates
Optionally edit the email notifications templates. For more information on how notifications work, see Email Notifications and Templates.
With a template opened, click on "</> Show Email Placeholders" to reveal a list of available placeholders for it. Click on any placeholder to copy it, and then paste it anywhere in the email subject or body. Custom fields you created can be inserted in the notification emails in the same way.
Business Settings
General
Define general settings and default settings for your services and appointments.
Company
Set up logo, name, address, phone and website of your company.
Notification
Optionally set the sender's name and email address to be used for all notification emails.
Working Hours & Days Off
Set company default working hours and days.
Working hours and days off can be customized for individual employees in the employees' settings page.
Payments
Set pricing options and payment methods that will be used in all bookings. By default, the "On-Site" (in-person) payment method is activated as the default payment method. To accept online payments, connect your Paypal and/or Stripe payment gateway(s).
Integrations
Do more through integrations with Zoom and Web Hooks (used to send data to external applications, eg. sending customer details to your CRM platform through Zapier).
Labels
Use these settings to change default name labels. For example, from "employee" to "provider".
Roles Settings
Set what customers and employees can do in the frontend customer portal ("My Bookings") and employee portal respectively.