Custom Fields

Sylvester @ FixAppt.com
Last Update 5 年前
Your booking form has only 3 default customer fields: Name, Email and Phone. If additional details are needed (eg. customer's address), you can use custom fields to request for these details.
A custom field can be individually assigned to specific services/events, or you can set it to apply to all.
Before creating custom fields, you should have already created the services and events where the fields will be assigned to.
Deleting a custom field will not delete any of its existing data.
Types of Custom Fields
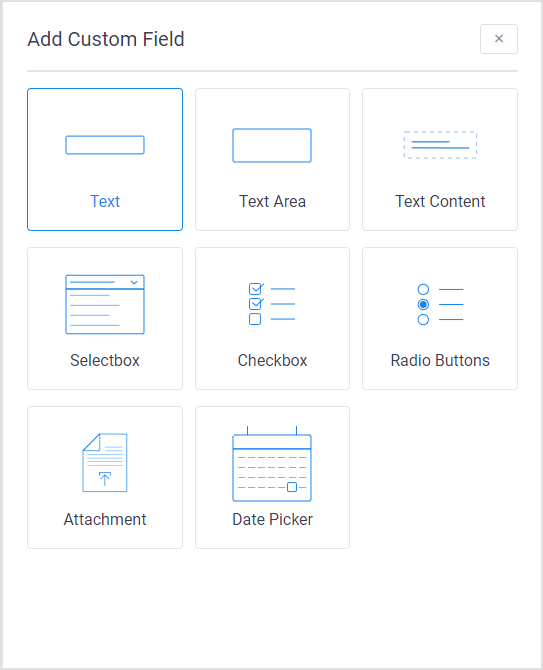
There are several field types available: Text, Text Area, Selectbox, Checkbox, Radio buttons, Attachment (currently .jpg, .jpeg, .png, .pdf, .xls, .txt, and .csv are supported) and Date Picker.
There is also a display-only field type named "Text Content" which you can use to display custom information (HTML allowed) like your booking Terms and Conditions.
Insert Custom Fields Data Into Email Templates
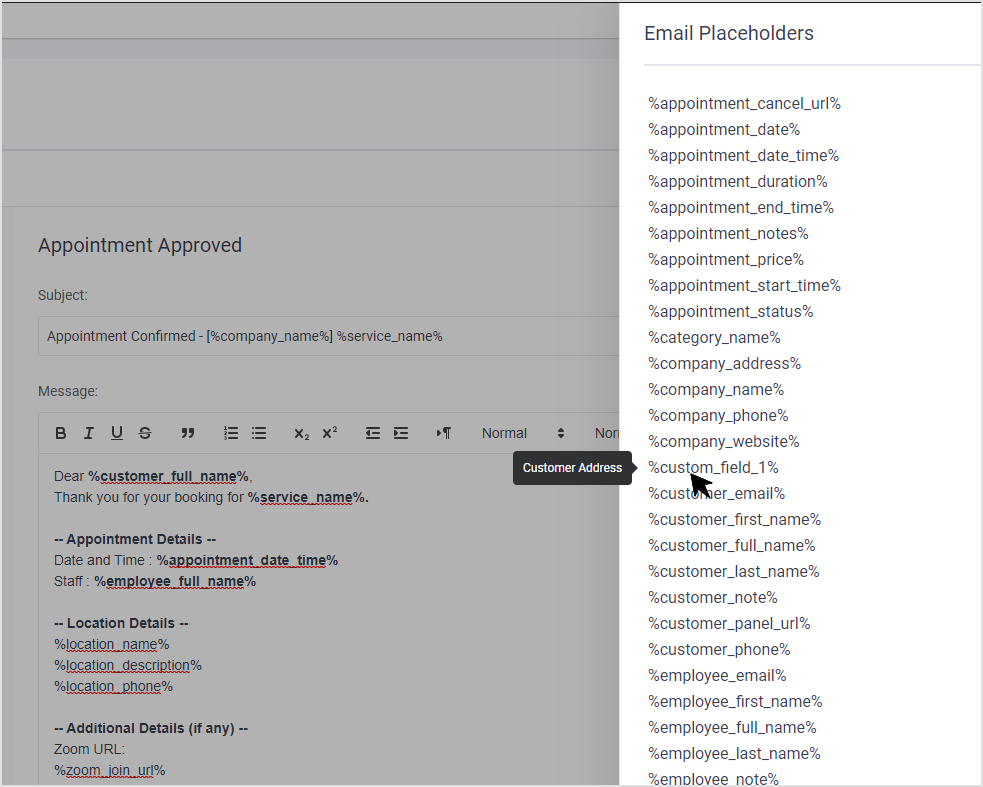
- Go to Settings > Email Templates and select the template you wish to add the custom field data to.
- With a template opened, click on "</> Show Email Placeholders" to reveal the placeholders for your custom fields.
- Hover over a custom field to see its name and click on it to copy it. Then paste it anywhere in the email template.
Add a Terms and Conditions section on the booking form
If you need to display terms and conditions on the booking form, you can do it using custom fields. Create a Text Content field with your T&Cs in it (HTML is allowed) and assign it to any or all services/events. You can create as many T&Cs fields as necessary and assign them accordingly.
New to HTML? No problem! Here's an online HTML editor which you can use to easily create your content and then copy and paste it into your field.
"I Agree" Checkbox
If you wish, you can place under the T&Cs a Checkbox field asking for the customer's acceptance of the T&Cs before the booking can be submitted. Remember to make this field mandatory by checking the "Required" box.